7. Special Scan Modes
This section describes special-purpose scan modes that change THOR's mode of operation or activate specific features. Some of these modes require a special license, which is highlighted in the relevant notes. If you have questions about those licenses, please contact our sales department at sales@nextron-systems.com.
7.1. Lab Scanning
Lab scanning mode is activated with --lab (formerly --fsonly).
It is used to scan mounted forensic images or a single directory on a
forensic workstation. All resource control functions are disabled, and
intense mode is activated by default.
The --lab parameter automatically activates the following options:
Enable intense mode, which causes several changes:
Scan every file intensively regardless of extension or magic header
Use
--max_file_size_intense(200 MB by default) instead of--max_file_sizeSet
--max-reasonsto unlimitedReduce
--minimum-sigma-levelto mediumSet
--nosoftso that soft mode is not activated automatically on systems with a single CPU core or low memory
--norescontrol(do not limit system resources or interrupt the scan on low memory)--nodoublecheck(do not check for other THOR instances on the same system)Multi-threading (THOR automatically sets the number of threads to the number of CPU cores found on the workstation)
The chapter Use Cases contains practical use cases that make use of this scan mode.
Note
If you run multiple THOR scans with multi-threading on a single system, resource usage will rise quickly since it scales per thread.
Consider using --threads to reduce the number of threads that each THOR
scan uses, e.g. --threads 4 if running 4 scans on a 16 core system.
7.1.1. Forensic Lab License
The scanning of mounted disk images, memory images, or network shares is a use case that we refer to as lab scanning. It requires a forensic lab license that is intended for corporate digital forensic labs.
All other license types are intended for different use cases, usually live system scanning. You can achieve a similar, but not equally thorough, scan with the following command-line flags:
C:\nextron\thor>thor64.exe -a Filescan --intense --norescontrol --cross-platform -p path-to-scan
Without a valid lab license, you cannot use multiple instances of THOR on a single system. The features mentioned in the following sub chapters are also limited to a lab license.
This article explains the advantages of a lab license.
7.1.2. Virtual Drive Mapping
Because THOR enriches messages with additional details, it can be
problematic to scan a mounted drive such as S: if it originally was
partition C: on the source system.
E.g. The analyst has mounted a partition "C:" from a source system to
drive "F:" on the forensic lab workstation. A SHIMCache entry points to
C:\temp\mk.exe. THOR would look at location C:\temp\mk.exe for
that file and couldn't find anything, since that file doesn't exist on
the forensic lab workstation.
Virtual drive mapping allows you to virtually map that drive to its original name. The syntax is as follows:
--virtual-map current-location:original-location
Some examples:
A original partition "C:" from the source system has been mounted to drive "F:" on the forensic lab workstation:
--virtual-map F:C
A original mount point "/" has been mounted to "/mnt/image1" on a Linux forensic lab workstation:
--virtual-map /mnt/image1:/
A Windows image of drive "C:" mounted to "/mnt/image1" on a Linux forensic lab workstation:
--virtual-map /mnt/image1:C
Note
This feature requires a forensic lab license type, which is meant to be used in forensic labs.
7.1.3. Hostname Replacement in Logs
The parameter -j can be used to set the hostname used in the log
files to a given identifier instead of using the current workstation's
name in all output files. If you don't use this flag, all log files
generated on that forensic lab workstation would contain the name of the
forensic lab workstation as the source.
You should use the name of the host from which the image has been retrieved as the value for that parameter.
-j orig-hostname
7.1.4. Artefact Collector
THOR 10.7.8 introduces the Artefact Collector module. The purpose of
this module is to be able to quickly collect and archive system
artifacts into a single ZIP via THOR.
It can be activated via --collector (running the collector module at
the end of a THOR run) or --collector-only (only running the
collector module) and uses :hostname:_collector.zip as output path
for the ZIP archive per default. The default ZIP archive path can be
changed with --collector-output <path>.
The ZIP archive includes all found artifacts and a special file called
collector.log containing logging information for the module execution
(e.g. timestamps, hashes, filesize, ...)
The artifacts which are collected per default (GLOB patterns) can be seen
with --collector-print-config. To change the default settings use
--collector-config <file>.
Tip
Pipe the output of --collector-print-config to a file and use a
modified version of it.
For testing the collector config you can use --collector-dry-run -
this only prints the artifacts which would be collected to stdout - no
output ZIP archive will be created. It is also possible to limit the
artifact size via the --collector-max-filesize flag.
If run on Windows, the collector module will parse the MFT and collect
files based on the extracted information. This allows the collection of
all files including special files like $UsnJrnl. The downside of MFT
parsing is that it takes a bit longer. If you do not care about special
files and want to speed up the collection process, use --collector-no-mft.
All flags can be found in the THOR full help (--fullhelp).
Note
A special license called THOR Deep Forensics is needed to use the
Artefact Collector feature.
7.1.5. Examples
7.1.5.1. THOR Lab Scanning Example
A full command line of a THOR scan started in a lab environment would look like this:
C:\nextron\thor>thor64.exe --lab -p S:\ --virtual-map S:C –j WKS001 -e C:\reports
It instructs THOR to scan the mounted partition S: in lab scanning mode,
maps the current partition “S:” to a virtual drive “C:”, replaces the
hostname with "WKS001" in the outputs and saves every output file (text
log, HTML, CSV) to a reports folder named C:\reports.
Note
This feature requires a forensic lab license type which is meant to be used in forensic labs.
7.1.5.2. Artefact Collector Example
The command line of a THOR scan in collector-only mode would like this:
C:\nextron\thor>thor.exe --collector-only
If you want THOR to run in its "classic" way and afterwards collect artifacts, use:
C:\nextron\thor>thor.exe <normal-THOR-flags> --collector
Note
This feature requires a forensic lab license type which is meant to be used in forensic labs.
7.2. Lookback Mode
The --lookback option allows you to restrict the Eventlog and log
file scan to a given amount of days. E.g. by using --lookback 3 you
instruct THOR to check only the log entries that have been created in
the last 3 days.
In THOR v10.5 we've extended this feature to include all applicable modules:
FileScan:Skipping files that are unchanged since the specified lookback period.Registry:Avoiding redundant analysis of registry keys or entries that have not been modified.Services:Focusing on service configurations or states that have changed.Registry Hives:Limiting scanning to hives with updates.EVTX Scan:Excluding log entries that predate the lookback threshold.
By setting the flags --global-lookback --lookback 2 you instruct
THOR to scan only elements that have been created or modified during the
last 2 days. This reduces the scan duration significantly.
This scan mode is perfect for quick scans to verify SIEM related events and is used by default in THOR Cloud's settings for executions via Microsoft Defender ATP.
7.3. Drop Zone Mode
The drop zone mode allows you to define a folder on your local hard
drive that is monitored for changes. If a new file is created in that
folder, THOR scans this file and writes a log message if suspicious
indicators have been found. The optional parameter --dropdelete can
be used to remove the dropped file once it has been scanned. Example:
C:\thor>thor64.exe --dropzone –p C:\dropzone
Warning
If another process writes a file to the drop zone, this is prone to a race condition: THOR might read the file when no or not all data has been written yet.
For consistent scan results, move files from another folder to the dropzone.
Note
This feature requires a Forensic Lab license or Thunderstorm license, both are meant to be used in forensic labs.
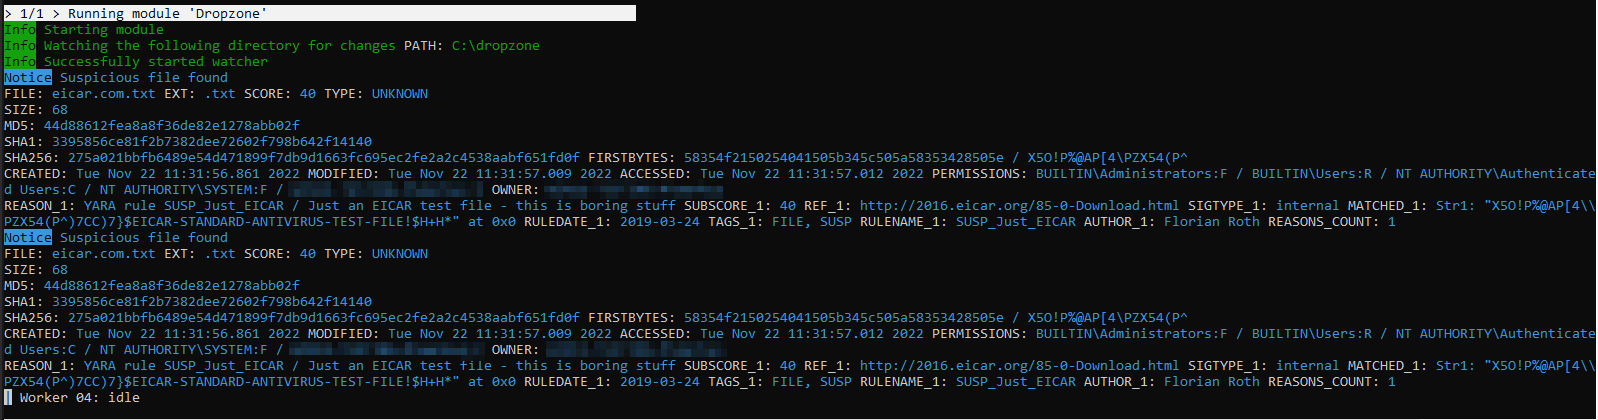
7.3.1. Drop Zone Mode Output
We designed the drop zone mode to show only relevant output (Notice, Warning or Alert) after the initialization to reduce clutter on the screen. This might look like no files are being scanned, which is actually not the case. To see if files are being scanned, you can do one of the following two options.
You can drop the EICAR test file into the defined dropzone to test if findings are shown properly:
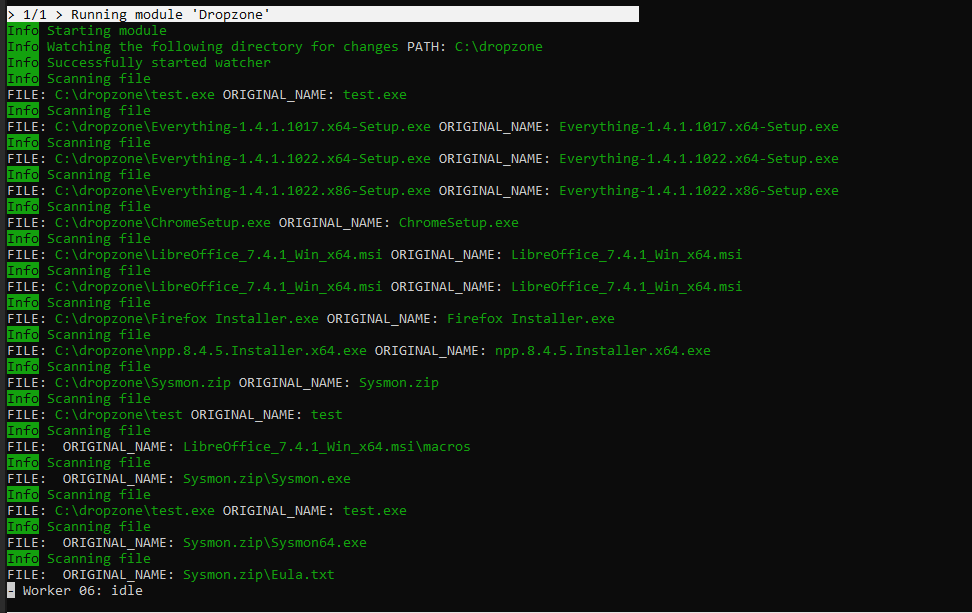
Or you can print all output with --printall - this might clutter the output:
7.4. Image File Scan Mode
The image file scan mode has a misleading name. It isn't meant to be used for forensic image scanning but for the scan of un-mountable images or memory dumps only. If you have a forensic image of a remote system, it is always recommended to mount the image as a Windows drive and scan it using the Lab Scanning (--lab) mode.
The Image File Scan mode performs a deep dive on a given data file. Therefore, the file type, structure or size of that file is not relevant. The DeepDive module processes the file in overlapping 3 Megabyte chunks and checks these chunks using the given YARA rule base only (including custom YARA signatures).
The only suitable use case is the scan of a memory dump using your own YARA signatures placed in the "./custom-signatures/yara" sub folder.
C:\nextron\thor>thor.exe –m systemX123.mem –j systemX123 –e C:\reports
Note
This feature requires a forensic lab license type which is meant to be used in forensic labs.
7.5. DeepDive
The DeepDive module allows a surface scan of a given memory dump.
This check processes every byte of the memory dump.
DeepDive is not recommended for triage sweeps in a whole network as it generates more false positives than a normal file system scan. This is mainly caused by the fact that chunks of data read from the dump are processed regardless of their corresponding file's type, name or extension. It processes Antivirus signatures, pagefile contents and other data that may trigger an alert.
In the current stage of development, the DeepDive check parses out every executable file and applies all included Yara signatures. A positive match is reported according to the score as "Notice", "Warning" or "Alert".
There are some disadvantages linked with the DeepDive detection engine:
The file name cannot be extracted from the raw executable code
The file path of the reported sample is unknown
THOR uses other attributes to report these findings:
Offsets
THOR reports the location on the disk, so that forensic investigators are able to check and extract the file from an image of the hard drive.
Restore
THOR is able to restore the whole file to a given directory. It uses the system's NetBIOS name, rule name, the score and the offset to create a file name for the extracted file.
As a side effect of this dissection all the embedded executables in other file formats like RTF or PDF are detected regardless of their way of concealment.
To perform a surface scan, use the "--image_file" option. To restore
all detected files to a restore directory additionally use the "-r
directory" option.
Option |
Description |
|---|---|
--image_file |
Activate DeepDive for a specific image file, i.e. |
-r directory |
Recovery directory for files found by DeepDive |
7.6. Eventlog Analysis
The Eventlog scan mode allows scanning certain Windows Eventlogs.
In intense mode, all Eventlogs are scanned. In normal or soft mode, the following Eventlogs are scanned:
System
Application
Security
Windows PowerShell
Microsoft-Windows-AppLocker/EXE and DLL
Microsoft-Windows-AppLocker/MSI and Script
Microsoft-Windows-CodeIntegrity/Operational
Microsoft-Windows-DeviceGuard/Operational
Microsoft-Windows-Folder Redirection/Operational
Microsoft-Windows-PowerShell/Operational
Microsoft-Windows-Sysmon/Operational
Microsoft-Windows-Security-Mitigations/KernelMode
Microsoft-Windows-Shell-Core/Operational
Microsoft-Windows-SmbClient/Security
Microsoft-Windows-SMBServer/Security
Microsoft-Windows-TaskScheduler/Operational
Microsoft-Windows-WMI-Activity/Operational
Microsoft-Windows-Windows Defender/Operational
Microsoft-Windows-Windows Firewall With Advanced Security/Firewall
Microsoft-Windows-WinINet-Config/ProxyConfigChanged
Microsoft-Windows-VHDMP-Operational
Microsoft-Windows-WLAN-AutoConfig/Operational
Microsoft-Windows-Winlogon/Operational
Microsoft-Windows-UniversalTelemetryClient/Operational
The parameter -n works like the -p parameter in the Filesystem
module. It takes the target Eventlog as parameter, which is the Windows
Eventlog's full name.
C:\nextron\thor>thor64.exe -a Eventlog –n "Microsoft-Windows-Sysmon/Operational"
From THOR 10.7.13 onwards, -n can also be used to scan all event logs
by using -n *.
You can get the full name of a Windows Eventlog by right clicking the Eventlog in Windows Event Viewer and selecting "Properties".
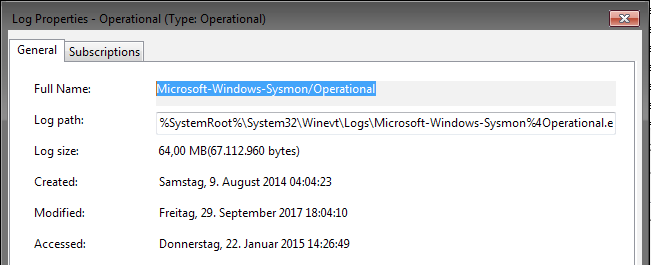
Windows Eventlog Properties
The -n parameter can also be used to restrict the Eventlog scanning to
certain Eventlogs. The following command will start a default THOR scan
and instructs the Eventlog module to scan only the “Security” and
“System” Eventlog.
C:\nextron\thor>thor64.exe -n Security -n System
7.7. MFT Analysis
The MFT analysis module reads the "Master File Table" (MFT) of a partition and parses its contents. The MFT analysis takes a significant amount of time and is only active in “intense” scan mode by default.
You can activate MFT analysis in any mode by using --mft.
The way THOR handles the MFT Analysis can be influenced by the following parameters:
Option |
Description |
|---|---|
--mft |
Activate MFT analysis |
--nomft |
Do not perform any MFT analysis whatsoever (only useful in combination with |